Black and White Point Adjustments of Photographic Images
Black and White Point Adjustments of Photographic Images

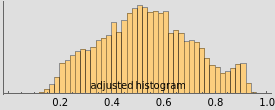
One way to optimize the appearance of a photograph is to maximize its tonal range. This can be done by setting the white point and black point of the photograph [1].
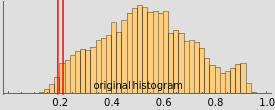
The black point is the minimum brightness setting that will not clip any shadows.
The white point is the maximum brightness setting that will not clip any highlights.
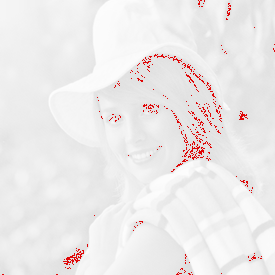
This Demonstration lets you set both the white and black points by means of a control image. This control image displays the photograph's pixels within a range of brightness values. As you move the slider from left to right, it is easy to find the brightness levels where the first blacks appear or where the last whites fade away.
1%
To set the black point, move the brightness slider on top to the far left and move it slowly to the right until the first red points appear in the control picture. Then click the "set black point" button.
To set the white point, move the brightness slider on top to the far right and move it slowly to the left until the first red points appear in the control picture. Then click the "set white point" button.
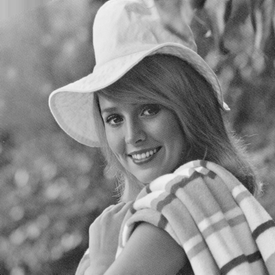
Setting the black point greatly improves the appearance of most photographs. Setting the white point may further improve the appearance. The adjusted photo appears on the right.