1 Creating Paclets in Wolfram Workbench 3.0 as of v12.2+
1 Creating Paclets in Wolfram Workbench 3.0 as of v12.2+
1.1 Create a new project
1.1 Create a new project
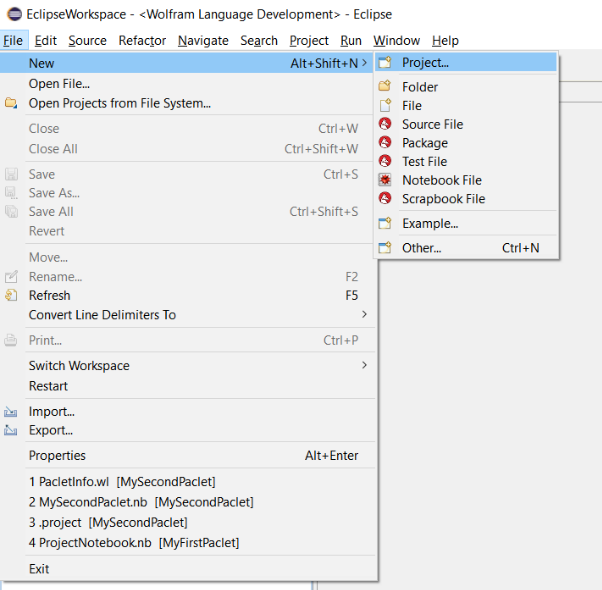
By selecting File>New>Project we can enter the process of creating a new project as usual:
1.1.1 Select a wizard
1.1.1 Select a wizard
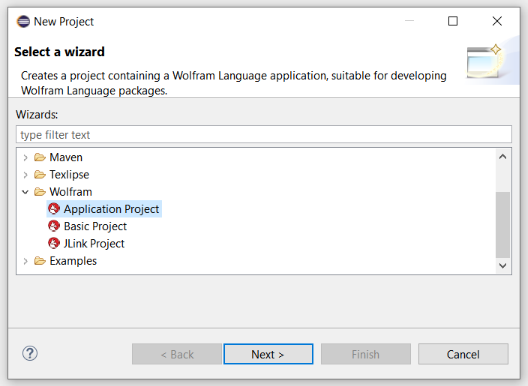
We may select the Application Project wizard that is well suited for Wolfram Language package development:
1.1.2 Wolfram Language project name and location
1.1.2 Wolfram Language project name and location
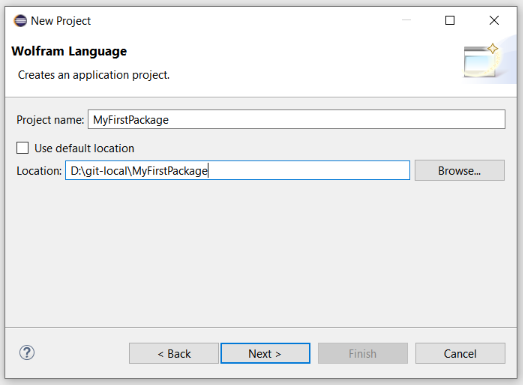
Next we create a new project called MyFirstPaclet. We can use the default workspace or a location of our choice. Since I am also using git for version control, I am collecting my projects in a directory called \git-local. Using the Browse... button I can create a new subdirectory \git-local\MyFirstPaclet and select it as Location:
1.1.3 Project References
1.1.3 Project References
In the next dialog we are asked for referenced projects—I will skip this for our minimal example by choosing Next >.
1.1.4 Application details
1.1.4 Application details
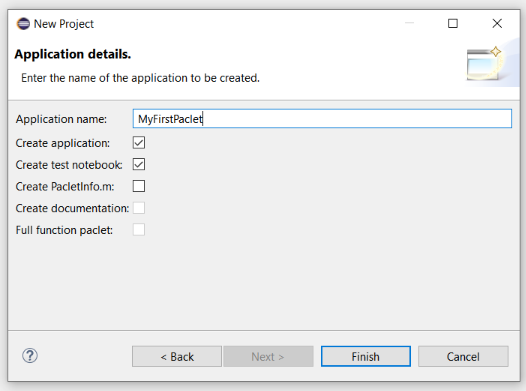
Finally, we need to give the application name which I also set to MyFirstPaclet. I will leave the default choices for the boxes unchanged. Note, that we are not choosing to create PactletInfo.m here—we will take care of this manually later on.
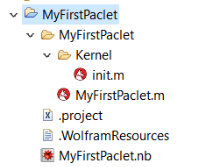
Upon selecting Finish we should have a project structure that looks like this in the Package Explorer window (note, that I deselected any filters to show all files):
1.2 Adapt the project structure
1.2 Adapt the project structure
1.2.1 Modify the project’s properties
1.2.1 Modify the project’s properties
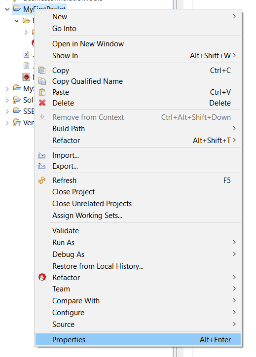
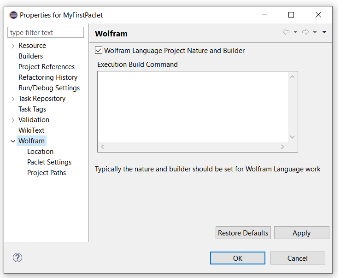
By right clicking on the project directory in the Package Explorer we can modify the project’s properties. The Wolfram entry has <<MyFirstPaclet` listed in the window titled Execution Build Command—we get rid of this and close the dialog with Ok.
1.2.2 Move and delete files
1.2.2 Move and delete files
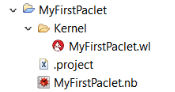
We will not need init.m and can thus delete it. We then move the file MyFirstPaclet.m into the directory \Kernel and we then rename (Refactor>Rename in the context menu) it to MyFirstPaclet.wl to be on the modern side of things; also we do not need the additional directory MyFirstPaclet so we can move the \Kernel directory to the top level and delete the subdirectory \MyFirstPaclet. We also delete the hidden file .WolframResources (it will always be recreated upon changes to the project properties).Our project structure should by now look like this:
1.3 Create PacketInfo.wl
1.3 Create PacketInfo.wl
1.3.1 Create custom PacletInfo file
1.3.1 Create custom PacletInfo file
1.3.2 Modify PacletInfo.wl
1.3.2 Modify PacletInfo.wl
If it is not yet shown in the editor, we can double click the newly created PacletInfo.wl file to enter the editor:
As we can see, the format is old and thus we can simply rewrite the Paclet[ ] section to be a PacletObject[ ]:
2 Developing the paclet
2 Developing the paclet
2.1 Writing code
2.1 Writing code
We are now al set and can develop our package. In this simple example we will just edit the main package MyFirstPaclet.wl in the /Kernel directory (to meet the example created in the OP by using CreatePaclet[ ]) as follows:
When we are done we simply save the modified file [Ctrl + s].
2.2 Running code
2.2 Running code
While our Run Session is still running, we can add another function to MyFirstPaclet.wl:
3 Deploying the paclet
3 Deploying the paclet
For what follows I assume that you are going to deploy your paclet to some paclet server. Again please refer to Todd's excellent guide for how to set this up. Personally, I am using a local directory in my \Dropbox directory, which works out nicely.
3.1 Creating a script for deployment
3.1 Creating a script for deployment
We then enter the following script, which of course has to be adapted, and save it [Ctrl + s]:
From now on we should be able to deploy the paclet simply by selecting the script file deployPaclet.wls and pressing F3.
Note: If newer versions of a paclet are added to the paclet server, it may be necessary to remove the older versions before updating the index files. I will check this and append the script later on.
3.2 Using the paclet
3.2 Using the paclet
If the PacletSite is registered, all one needs to do is to install the paclet once into$UserBasePacletsDirectory by
Note: There is currently no way to force PacletInstall or PacletInstallSubmit to install paclets into $BasePacletsDirectory, but paclets can be placed there by hand to become visible to all users on the system.
Any notebook that needs the paclet then can use it with Needs[ ]: